After tasting this delicious banana cake that Yiling & John brought from JB for us, it has been in my to-do list to attempt to recreate what I had. Browsed through multiple recipes but none seem to give the result I want, until I saw this one at my baking group... and I tried it... and it is AMAZING!!!
Recipe altered & adapted from Richard Goh Baking Class Stage 1 from Wen's Delight Page:
Ingredients:
2.5-3 Eggs (Room temp - Approx 150g)
130g Sugar (Reduced, original-150g) ( I used 70g White sugar and 60g brown sugar)
200g Banana (Ripe & cut into small pcs)
150g Top Flour (or plain flour/superlite flour/cake flour)
1/2 tsp Baking powder
1/4 tsp Baking soda
100g Corn oil (or any vegetable oil except olive oil, if prefer richer
flavour replace with melted butter but it may cover the banana fragrant)
1/8 tsp Banana essense (optional)
Method:Preheat oven to 160 degree C.
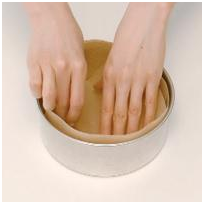
Grease & line a 8" round tin with paper.
1. Sieve flour, baking powder & soda together. Sieve twice & set aside.
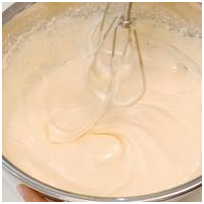
2. Whisk eggs, sugar & banana at max. speed till stiff/ribbon stage. (For Kenwood Chef - approx 10-13mins)
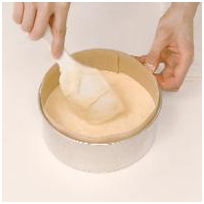
3. Fold in flour & mix well. (Can use spatula or hand to mix)
4. Add in oil & mix well till batter is shiny & flowing.
5. Bake for 40 - 45mins.
Sunday, 17 March 2013
Monday, 25 February 2013
New Family Members
Hello! New babies of the family! 2.5months old.Born Dec 2012... Looking forward to a long wonderful time with them! <3<3<3
Tuesday, 22 January 2013
Basic Sponge Cake (Light)
This is the sponge cake recipe which I saw on Cuoca.com. This is an amazingly versatile light Japanese sponge cake with amazingly fine crumb structure. The original recipe is for Strawberry Shortcake, but you can really use the basic sponge for literally anything! I have adjusted some parts of it to suit our taste... and you can even watch a step-by-step video on how to do it here <iframe width="640" height="360" src="http://www.youtube.com/embed/bHMBuxrQzf8" frameborder="0" allowfullscreen></iframe>
Sponge Cake (Cuoca) – 15cm (6”) – Strawberry Shortcake
Dairy Cream 350g
Castor Sugar 28g
Strawberry Syrup 18g
Strawberry S Size 12 pcs + 4 for garnish
Eggs to be brought to room temperature, sift the flour, line pan with baking paper on the sides and bottm. Preheat oven to 170°C. Melt butter and mix with milk at about 50°C
Put eggs in bowl and whisk to loosen, add in sugar and beat with mixer in a hot water bath (to warm to body temperature while whisking). Remove from heat and continue beating until ribbon stage.
After ribbon stage is reached, switch back to hand-whisk and stir-beat until you get smooth batter with fine bubbles.
In a separate bowl containing melted butter, warm milk and vanilla, take some batter and mix to get lighten up and get a closer consistency (combine better later).
Add in flour to main batter and fold in lightly until no more flour is visible.
Add in butter/milk/vanilla batter and fold to mix well.
Pour into prepared tin, drop a couple of times to remove large air bubbles and bake for about 25mins until cake springs back to touch.
Remove from tin about 10mins after its out of the oven and set to cool in in the paper.
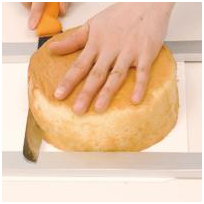
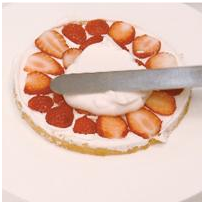
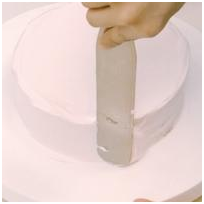
Assemble cake: Trim of browned top and bottom of cake. Use aluminum ruler to help in measuring while cutting into 1cm slices. Wrap sliced sponge in plastic wrap to prevent drying until ready for use.
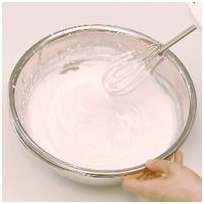
Whip cream with strawberry syrup on ice water bath.
*

Sponge Cake (Cuoca) – 15cm (6”) – Strawberry Shortcake
| Ingredients: | 6” | 7” |
| Whole Eggs | 2 (100g) | 4 (200g) |
| Castor Sugar | 65g | 130g |
| Unsalted Butter | 20g | 40g |
| Milk | 15g | 30g |
| Vanilla X | ½ tsp | 1tsp |
| Cake Flour | 60g | 120g |
Dairy Cream 350g
Castor Sugar 28g
Strawberry Syrup 18g
Strawberry S Size 12 pcs + 4 for garnish
Eggs to be brought to room temperature, sift the flour, line pan with baking paper on the sides and bottm. Preheat oven to 170°C. Melt butter and mix with milk at about 50°C
Put eggs in bowl and whisk to loosen, add in sugar and beat with mixer in a hot water bath (to warm to body temperature while whisking). Remove from heat and continue beating until ribbon stage.
After ribbon stage is reached, switch back to hand-whisk and stir-beat until you get smooth batter with fine bubbles.
In a separate bowl containing melted butter, warm milk and vanilla, take some batter and mix to get lighten up and get a closer consistency (combine better later).
Add in flour to main batter and fold in lightly until no more flour is visible.
Add in butter/milk/vanilla batter and fold to mix well.
Pour into prepared tin, drop a couple of times to remove large air bubbles and bake for about 25mins until cake springs back to touch.
Remove from tin about 10mins after its out of the oven and set to cool in in the paper.
Assemble cake: Trim of browned top and bottom of cake. Use aluminum ruler to help in measuring while cutting into 1cm slices. Wrap sliced sponge in plastic wrap to prevent drying until ready for use.
Whip cream with strawberry syrup on ice water bath.
Monday, 21 January 2013
Red Velvet Cake with Cream Cheese Icing
This is my ultimate favourite chocolate cake! Super comfort food which would literally cheer me up when I'm down... and makes an event complete... Not difficult to make, but very tricky to cook. Once its overcooked, you get a dry and hard product. Undercook it, you get gooey madness... It has to be just right, to be in the wonderful state of velvety and rich taste, while maintaining a moist and light crumb structure. This recipe, which I received as a subscription to Food Republic won me over... and I have not found anything I like better than this one... (after going through hundreds of similar recipes)... so here it is...
Red Velvet Cake with Cream Cheese Icing
Servings: 10 servings
IngredientsCake:
2 1/2 cups cake flour (312.50g)
1/2 teaspoon salt
2 tablespoons cocoa powder
1 stick unsalted butter, room temperature (113.4g)
1 cup sugar
2 eggs
2 teaspoon vanilla extract
1 cup buttermilk (or can use 1 cup sour cream)
2 tablespoons red food coloring
1 teaspoon white vinegar
1 teaspoon baking soda
Cream Cheese Frosting:
1 1/2 sticks unsalted butter, room temperature (170.11g)
12 ounces cream cheese, room temperature (340.19g)
2 cups powdered sugar, sifted (Add to taste)
1 teaspoon vanilla extract
1 to 2 tablespoons heavy cream
Directions:
Cake
- Preheat oven to 350 degrees F and make sure the rack is in center of oven. Butter two 9- inch round cake pans and line the bottoms of the pans with parchment paper. Set aside.
- In a mixing bowl sift the flour, salt and cocoa powder together.
- In an electric mixer or with a hand held mixer beat the butter until soft. Then add the sugar and beat until light and fluffy, about 5 minutes.
- Add the eggs, one at a time, mixing after each addition until it is well incorporated.
- Scrape the sides of the mixing bowl and add the vanilla. Beat until combined.
- In a little bowl combine the buttermilk and red food coloring. With the mixer on low, alternately add the flour mixture and buttermilk to the butter mixture.
- In a different bowl combine the vinegar and baking soda. Allow the mixture to fizz and then quickly fold into the cake batter.
- Divide the batter evenly between the two prepared pans and smooth the tops.Bake in the preheated oven for 25-30 minutes, or until a toothpick or skewer inserted in the center of the cakes comes out clean.
- Cool the cakes in their pans on a wire rack for 10 minutes. Then invert, lifting off the pan.
- Once they have completely cooled, wrap in plastic and place the cake layers in the freezer for at least an hour or overnight. This is how the pros do it. It makes icing and assembling the cake so much easier.
Cream Cheese Frosting
- In the bowl of your electric mixer, or with a hand mixer, beat the butter and cream cheese until smooth.
- Add the vanilla and confectioners sugar and beat until smooth.
- Using the whisk attachment, gradually add the heavy cream and whip until the frosting is thick enough to spread. Add more cream as needed to get the right consistency.
Assembly
- With a long serrated knife cut each cake layer in half, horizontally. You'll now have four cake layers. Place one layer, top of the cake facing down, onto your serving platter. Spread the cake layer with frosting.
- Place another layer of cake on top of the frosting and continue to frost and stack the cake layers. Frost the top and sides of the cake.
Source: http://www.foodrepublic.com/2011/07/25/red-velvet-cake-cream-cheese-icing
Friday, 14 December 2012
History Revisited
2 years into baking... from ZERO to... ahem.... HERO...
This was perhaps my starting point... November 2010...
Before this... all my knowledge was from the Home Economics classes or Food & Nutrition classes back in Secondary school, and that, we weren't even doing anything much for baking. Most stuff were cooking dishes... and that, was always my ultimate class. After graduating, I never ever have the chance to bake anymore, as I don't own an oven, nor can I afford even a hand-mixer. Hand-whipped trials proved meaningless as none passed and I forgotten all about it anyway.
Not until around November 2010 that I picked up this cute little 4 or 5-inch round pans from Daiso that I started to trial and experiment.
An extract from ChocolateCandyFloss HomeBakes... my offical online home bakery
"Always love baking and eating pastries as a child, I never thought it was possible, since I'm really poor and couldn't afford equipment or ingredients to do anything more than rub-in cookies or hand-whisked creations which most often fail... using a second-hand oven my dad repaired from some rejects.
Everything else was chucked away eventually, when life becomes so busy when I graduated and started working... followed by falling in love and getting married and starting a family...
One fine day, as I was shopping around at Daiso, I saw these mini cake tins which were barely 5". I just got 2 of them on impulse and went home and immediately tried doing something... It ended up yummy... and that somehow sparked and brought back tonnes of memories... I feel this sparkle... and I know I will never let this go again.
However, with family and kids commitments, I'm unable to attend any bakery courses, and professional courses are so expensive I can't afford... But I somehow came across youtube and the internet as a whole resource library and I learnt bits and pieces from here and there... and from countless failures I pieced in the puzzle... and finally GOT IT!
All thanks to the first present from my hubby, a boysenberry kitchenaid 4.5Qt mixer and a 30L Sharp Healsio Water Oven, I embarked on my journey of baking and countless creations... until I found CRUMB BOSS, where she became my greatest inspiration to create and share ideas and recipes... and just want to prove to the world that you do not need dozens of professional qualifications in order to bake, but instead, a whole heart full of passion for the art and determination to succeed.
I will never give up and will innovate and try new things... ever forever. :)"
Anyone, everyone out there... who was me, previously, feeling ever frustrated trying to find a good workable recipe, trying to troubleshoot failed recipes, etc etc... I'm happy to share my findings, from all the pains and wastage I have gone through the past 1.5 years with everyone sharing the same passion. Its better you learn from the basics and understand why this fails and that fails and how each different ingredient work instead of just picking up something and just follow procedure but duno how it works.
From someone whom:
Don't know that there is something called "Unsalted Butter"
Don't know what is "shortening"
Thought chiffon just produced by hot-stamping cakes on moulds
Don't know about cake flour, top flour, AP flour
Don't know what is the difference between using a whisk or a creamer
Don't know there's things such as baking chocolate, chocolate couverture, compound chocolate, candy dips, fondant, marzipan, sugarpaste, gumpaste
and the list goes on!
To one whom can explain every single item, how it works, how it behaves and how its applied.
You really don't need dozens of professional qualifications and certificates to bake. What you really need, is a heart full of passion and determination!
This was perhaps my starting point... November 2010...
Before this... all my knowledge was from the Home Economics classes or Food & Nutrition classes back in Secondary school, and that, we weren't even doing anything much for baking. Most stuff were cooking dishes... and that, was always my ultimate class. After graduating, I never ever have the chance to bake anymore, as I don't own an oven, nor can I afford even a hand-mixer. Hand-whipped trials proved meaningless as none passed and I forgotten all about it anyway.
Not until around November 2010 that I picked up this cute little 4 or 5-inch round pans from Daiso that I started to trial and experiment.
An extract from ChocolateCandyFloss HomeBakes... my offical online home bakery
"Always love baking and eating pastries as a child, I never thought it was possible, since I'm really poor and couldn't afford equipment or ingredients to do anything more than rub-in cookies or hand-whisked creations which most often fail... using a second-hand oven my dad repaired from some rejects.
Everything else was chucked away eventually, when life becomes so busy when I graduated and started working... followed by falling in love and getting married and starting a family...
One fine day, as I was shopping around at Daiso, I saw these mini cake tins which were barely 5". I just got 2 of them on impulse and went home and immediately tried doing something... It ended up yummy... and that somehow sparked and brought back tonnes of memories... I feel this sparkle... and I know I will never let this go again.
However, with family and kids commitments, I'm unable to attend any bakery courses, and professional courses are so expensive I can't afford... But I somehow came across youtube and the internet as a whole resource library and I learnt bits and pieces from here and there... and from countless failures I pieced in the puzzle... and finally GOT IT!
All thanks to the first present from my hubby, a boysenberry kitchenaid 4.5Qt mixer and a 30L Sharp Healsio Water Oven, I embarked on my journey of baking and countless creations... until I found CRUMB BOSS, where she became my greatest inspiration to create and share ideas and recipes... and just want to prove to the world that you do not need dozens of professional qualifications in order to bake, but instead, a whole heart full of passion for the art and determination to succeed.
I will never give up and will innovate and try new things... ever forever. :)"
Anyone, everyone out there... who was me, previously, feeling ever frustrated trying to find a good workable recipe, trying to troubleshoot failed recipes, etc etc... I'm happy to share my findings, from all the pains and wastage I have gone through the past 1.5 years with everyone sharing the same passion. Its better you learn from the basics and understand why this fails and that fails and how each different ingredient work instead of just picking up something and just follow procedure but duno how it works.
From someone whom:
Don't know that there is something called "Unsalted Butter"
Don't know what is "shortening"
Thought chiffon just produced by hot-stamping cakes on moulds
Don't know about cake flour, top flour, AP flour
Don't know what is the difference between using a whisk or a creamer
Don't know there's things such as baking chocolate, chocolate couverture, compound chocolate, candy dips, fondant, marzipan, sugarpaste, gumpaste
and the list goes on!
To one whom can explain every single item, how it works, how it behaves and how its applied.
You really don't need dozens of professional qualifications and certificates to bake. What you really need, is a heart full of passion and determination!
Coffee Cake & Checkerboard Cake
I am in love with this basic sponge cake from Cuoca... It is amazingly light and delicious, you can eat it on its own, and it works magically as any birthday cake base... The feel you cut into it is just as what you get from outside... and yet it is only achieved with pure eggs, sugar, vanilla extract, melted butter and cake flour! Yes, no baking powder, no ovalette, no additives, no enhancers AT ALL!!!
I have been using the same recipe since the first time when I did the green tea swiss roll. And, it turns out beautifully each time! Almost zero shrinkage and the crumb structure inside is amazingly fine, yet is strong enough to withstand movement even after it has been sliced thinly.
I have tried making checkerboard cake for orders and look at the black and white cake. Just play around with the basic vanilla sponge recipe and you can make a hundred flavours just by changing the ingredients.
Look at the very fine crumb structure! Its definitely something that I have been searching for the past 2 years and finally got it!!! Sooooo very the HAPPY!
Easily handled... no breakage while maintaining its soft-as-silk texture
Viola~ Transformed into a Monchhichi cake! LOVE IT!!! Best thing is, everyone LOVES the cake! And has amazing compliments for it.... :) Contented....
I have been using the same recipe since the first time when I did the green tea swiss roll. And, it turns out beautifully each time! Almost zero shrinkage and the crumb structure inside is amazingly fine, yet is strong enough to withstand movement even after it has been sliced thinly.
I have tried making checkerboard cake for orders and look at the black and white cake. Just play around with the basic vanilla sponge recipe and you can make a hundred flavours just by changing the ingredients.
Look at the very fine crumb structure! Its definitely something that I have been searching for the past 2 years and finally got it!!! Sooooo very the HAPPY!
Easily handled... no breakage while maintaining its soft-as-silk texture
Viola~ Transformed into a Monchhichi cake! LOVE IT!!! Best thing is, everyone LOVES the cake! And has amazing compliments for it.... :) Contented....
Sunday, 2 December 2012
Christmas Cake Bake-Off Crumb Boss : Cranberry Orange Cardamom Bundt
Cranberry Orange Cardamom Bundt


Ingredients:
- 1 cup unsalted butter, softened
- 4 ounces cream cheese, softened
- 1 cup sugar
- 1 cup packed light brown sugar
- 4 large eggs, room temperature
- 3/4 cup sour cream
- 2 tablespoons grated orange zest
- 1 1/2 tsp vanilla extract
- 2 1/2 cups flour
- 1/4 cup cornstarch
- 1 1/4 tsp baking soda
- 2 tsp ground cardamom
- 1/2 tsp salt
- 1 1/2 cups dried sweetened cranberries
- 4 ounces chopped white chocolate
- 3/4 cup toasted chopped walnuts
- 1/2 tsp powdered sugar
- 1/4 tsp ground cinnamon
Preheat the oven to 180 degrees C. Spray Bundt Pan with cooking spray and flour it, tapping away excess. Oil it very well so it doesn't stick to the pan after baking. Cream the butter, cream cheese, sugar and brown sugar in a large bowl with an electric mixer on high speed until light and fluffy. Decrease the speed to medium and add in eggs, on at a time, sour cream, orange zest and vanilla. Scrape down the bowl as needed. Mix batter well.
Sift flour, cornstarch, baking soda, cardamom and salt together in a medium mixing bowl. With the mixer on low speed, add flour mixture to the butter mixture, mixing just to combine. Fold in cranberries, white chocolate and walnuts. Pour batter into prepared pan, pushing batter in all crevices with a spatula and smooth top. Gently tap the batter on center rack and bake 50-55 minutes, until a wooden pick comes out almost clean. There may be a few moist crumbs.
Remove cake from oven when done and cool on wire rack for 10 minutes. Invert cake onto cake pedestal or wire rack and cool completely.
Serving recommendations:
A perfect and gorgeous table centerpiece, this Cranberry Orange Cardamom cake is wonderful for breakfast, lunch or dinner dessert! It is fabulous with a dollop of fresh cinnamon spiced whipped cream or a scoop of vanilla bean or cinnamon ice cream.
Recipe courtesy of Nordic Ware
There is a contest on Crumb Boss page for Christmas cake! And the prize is very enticing!
And so I had my go at it....
Subscribe to:
Posts (Atom)