Sunday, 19 August 2012

No Fail Sturdy Sugar Cookies

I needed a sturdy cookie recipe to make this diabolo cookie...


It wasn't really meant to look like this as I planned to connect the 2 pieces with a straw and then cover that part with modeling chocolate and then cover it with silver edible dust. However, after coming back from JB grocery trip in the morning, I was left with little time to accomplish the project. Finally, I couldn't even have enough time to wait for the chocolate coating to set... and instead of packing into separate bags, I can only put it into the cake box. However, from there I found this amazing sugar cookie recipe... which is super delicious and sturdy, and really can withstand stress. No chilling of the dough is required and it can be used immediately. Its not a sticky dough and I would recommend you do not over-mix the flour. Recipe adopted from here. Its a damn good recipe and I'm definitely going to use it again and again...

No-Fail Sugar Cookies

6 cups flour
3 tsp. baking powder
2 cups butter
2 cups sugar
2 eggs
2 tsp. vanilla extract or desired flavoring (I like almond myself)
1 tsp. salt

Cream butter and sugar until light and fluffy. Add eggs and vanilla. Mix well. Mix dry ingredients and add a little at a time to butter mixture. Mix until flour is completely incorporated and the dough comes together.

Chill for 1 to 2 hours (or see Hint below) - I don't find this necessary.

Roll to desired thickness and cut into desired shapes. Bake on ungreased baking sheet at 350 degrees for 8 to 10 minutes or until just beginning to turn brown around the edges. This recipe can make up to 5-dozen 3” cookies.

HINT: Rolling Out Dough Without the Mess -- Rather than wait for your cookie dough to chill, take the freshly made dough and place a glob between two sheets of parchment paper. Roll it out to the desired thickness then place the dough and paper on a cookie sheet and pop it into the refrigerator. Continue rolling out your dough between sheets of paper until you have used it all. By the time you are finished, the first batch will be completely chilled and ready to cut. Reroll leftover dough and repeat the process! An added bonus is that you are not adding any additional flour to your cookies.

The cookies are decorated with Royal Icing.

Royal Icing

3 3/4 cups sifted confectioners' sugar
3 T meringue powder
6 T warm water

Beat 4 to 5 minutes.
By hand, stir in optional flavorings and desired tints.

Saturday, 18 August 2012

Experimenting with Optima Flour

I finally laid my hands on a pack of this Optima flour. Its a flour with all the industrial use leveners, emulsifiers, chemicals etc in it. And it was labelled as the legendary NO FAIL Sponge cake mix. 

It contains everything... even sugar... so there's no need to even add sugar. 


What we need to do is... add eggs, water, and oil. I followed the swiss roll from AuntyYochana's blogsite... where she has famous swiss rolls made to perfection. I have never stopped exploring how to achieve the soft and fluffy texture of the Polar Sugar (Swiss) Roll...After doing loads of research long ago and never been able to confirm my hypothesis, I decided to try it out.

Opened and the flour is white and sparkly... I guess its from the sugar crystals? And I smelled it... it smells kinda weird... like baking soda and a little plasticky?? Other than that it looks OK.

Directions were to add eggs and water to the flour mixture, with yochana's recipe, a teaspoon of ovalett is required, so I put as per recipe. Then, whisk the mixture until its white and thick... and then add in the oil and vanilla essence and bake it... for the swiss roll, I'm doing it at 200 deg for about 11mins. 


That's the resultant sponge sheet. Not expecting it to be that super fragile, I tried flipping it over onto a sugared baking paper, and it crumbles into pieces. I fixed it and decided to make another one. I made 1/3 batch of buttercream and used it for 2 rolls.

My knife wasn't that good so I didn't manage to do such a clean cut...and I didn't put as much sugar cos scared too sweet... I took a bite and chewed... instantly... POLAR SUGAR ROLL appears right in my mind. That is it. Mystery solved. That is EXACTLY what the sugar rolls taste and feels like. Its nothing like what we can do at home with the natural ingredients without putting in all these chemical agents. The flour was crazy priced at $5 a pack (compared to $2.25 normal flour). As I eat and enjoy the wonderful texture, I can't help but picturing how much chemical goes into this...and other pastries in the commercial bakeries... I will definitely carry on making cakes and pastries the old fashioned way.

Tuesday, 24 July 2012

Cupcakes - Cookies, butterflies, grape

Taking a big risk, I took up the order, wishing my oven will cooperate and work one more time for me last Sunday... She has a gathering and it would be a pity to not get cupcakes...and I will be so sad not getting to make any! 

It works, finally! And I got these up... Made the Cookies 'N' Cream cupcakes from harwood podcast.com which was so delicious the other time I made it I had to do it again! Adopted some deco ideas from crumb boss, I made the delicious cookies and cream cupcakes... followed by hot cocoa cupcakes from crumb boss (without the cyanne pepper) and made the butterflies and grape design on a slice of fondant... I had great fun making them and customer was super happy... :) Can't wait to take up more jobs! (and of all... get my oven repaired so I can do so...)

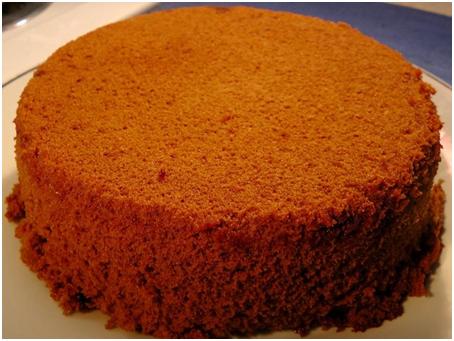
Microwave Chocolate Cake


Saw this microwave cake recipe from youtube Nicko's Kitchen, I couldn't resist trying it out... it looks so super simple and yet delicious... and on Sunday morning, I did it, with my dying multifunction oven's microwave function. 

Ingredients:

1 cup flour (Self-raising. For AP Flour add 1/2 tsp baking powder)
1/4 cup 'stevia sugar' (or 1 cup sugar - I use 1/2 cup)
1/4 cup cocoa powder
1 egg
1/2 cup peanut butter
1/2 cup milk


There's no peanut butter at home so I left it out and replaced with 1/4 cup vegetable oil. Just dump everything in into a microwave safe bowl with big enough space for any expansion, mix well and then pop it in and set on HIGH for 3-5mins. 5mins works fine for me. When it comes out, it kinda shrinks abit while it starts to cool off, but that's good because it actually helps it to come out so easily.It just plops out onto the plate. The texture is moist and dense... just like a usual rich chocolate cake.

That brings me to this eggless (vegetarian) cake... from a request by another colleague... I have no chance to try it out but I found this recipe from an Indian cooking channel... which looks good.... I might just try it out once my oven gets repaired and comes back to me...

Microwave Eggless Chocolate Cake


Introduction:
Chocolates bring wide smiles on our faces! And wouldn't it be great if something more chocolaty, fresh, spongy, fluffy gets ready in just 5 mts. Yup yup I am talking about 5 mts Egg-less Chocolate Cake recipe. What are you waiting for? Invite your guests and impress them with this an easy to make Egg-less Chocolate cake at home :)
Preparation time : 10 mts
Cooking time : 5 mts
Serves : 4 to 6 people


Ingredients:
  • 1 1/2 cup All Purpose flour / Maida

  • 1 cup Whole Milk
  • 1 cup Sugar
  • 3 tbsp Cocoa powder
  • 1/2 tsp Baking powder
  • 1/4 tsp Baking Soda
  • 1 tbsp Lemon juice
  • 1/2 tsp Vanilla extract
  • 3 tbsp Oil
    Method:
    • Prepare microwave safe dish by greasing it using some oil and line up at bottom using some wax paper or aluminium foil.
    • Mix milk and sugar until sugar is completely dissolved.
    • Sieve maida, cocoa powder, baking powder, baking soda in milk mixture. Combine everything to make sure there are no lumps of any dry ingredient.
    • Add vanilla extract and oil and again mix well.
    • Finally add 1 tbsp lemon juice and mix everything well.
    • Pour batter in microwave safe dish and microwave over high power for 5 mts.
    • Insert toothpick if it comes out clear cake is ready.
    • Give it a standing time of 5 mts.
    • Then gently transfer cake on a cooling rack.
    • Enjoy with a scoop of cool whip, vanilla ice cream topped up with some chocolate syrup!

    Tips:
    • Power setting for each microwave differ so cook cake as per your own judgement. If after 5 mts, cake is not cooked, allow it to cook for another 1 or 2 mt in microwave.
    • Make sure to use deep and wide microwave safe dish. So that cake batter will nit overflow from dish.
    • The ingredient listed above are suitable to our taste buds, you can pretty much change the quantity of sugar and cocoa powder.


    Source: http://madhurasrecipe.com/index.php?p=1_247_Microwave-Eggless-Chocolate-Cake-Whip-up-in-just-5-mts

Durian Cake


Had a durian cake request from colleague the other day and I attempted at one, even though my oven is at the verge of death... It can only work for one time a day, there seems to be some problem with the main control knob which basically controls EVERY FUNCTION. Thus I was worried that I under-cook the cake... and I tried to counter that by cooking it for a longer time. How WRONG! The cake turn out to be OVERCOOKED... and it has become kinda dry. Not being able to make another, I had to use it anyway. 

I used crumb boss's vanilla cake recipe (with additional of a few drops of durian essence), and with the durian pulp I removed from 2 durians, I beat it into the fresh/whipped cream with another few drops of durian essence to enhance the flavour further. As I do not have too much time on hand, simple decoration does it. Made 3 smaller loafs with the large rectangular pan... and even though the cake texture is not as good as usual, the yummilicious filling and topping makes up for every bit... Couldn't love it more... Will definitely try it again with keikos light sponge cake or redo with the vanilla cake recipe... once my oven gets repaired...

Tuesday, 12 June 2012

Fondant Cakes

From the first fondant cake for the little girl Gwyneth's Birthday...


Comes the next... a tie-dye inspired cake for my mum's birthday!


 I really love the pattern created... the pastel colours blend in perfectly...

And the cutting... is the most exciting part ever, in creating every cake... I love playing with fondant, now that I discovered it... Its like re-living my childhood... where we don't really have "play dough" yet... and we play with those yuckky "Plasticine"? This is so much more fun... and the best part? Its EDIBLE... though I would say its too sweet for my family's liking... well, you know the older folks will not prefer this, but the prettiness this creates is beyond what you can do with buttercream or Chantilly/Whipped cream, so, I'll still make this once in a while to satisfy a sweet tooth ba!

Always welcome to enjoy baking together: http://www.facebook.com/groups/Chocolatecandyfloss.bakes/

Lets bake and eat cake!

Egg Tarts!

These... are one of my favourite... and finally I got down to making them! And this pic was from last night! They ROCK!!!

Egg Tarts

Make about 20 tart skins 7cm x 3cm

Tart Skin: Crumb Boss Basic Cookie Dough (with tweaks)
Plain Flour        1.5 cups (355g)
Butter            113.4g (4 oz)
Confectioner’s Sugar    1 cup (236.6g)
Egg Yolks        3
Vanilla Extract        ½ tsp

Egg filling
Whole eggs        3
Caster Sugar        100g
Hot Water        225g
Evaporated Milk    85g
Vanilla Extract        ½ tsp

Method:

Tart: Cream butter and confectioner’s sugar together for about 5mins till its creamy white and fluffy. Add in egg yolks, vanilla extract and mix well. Add in Sifted flour and work into a dough. Do not overmix/beat or you’ll end up with a tough product. Let it sit in the fridge for about ½ hr if its too soft or use immediately. Roll out on floured board and cut out circles with circle cutter and line tart base. Use a fork to poke the base a few times (to prevent air trapped below from mis-shaping the skin). Bake blind in preheated over at 180 deg for about 5mins.


Filling: Mix caster sugar with hot water and stir until all dissolved. Let it cool till lukewarm. Beat eggs with hand beater/fork and add in the rest of the ingredients together. Run the mixture through the sieve to remove bubbles and undissolved egg particles. This will ensure you get a smooth product.

Fill into tart blinds till brim and bake in the oven at about 160-170 degrees until tart skin is golden and the eggs are not longer watery in the middle when you shake them, about 20mins.